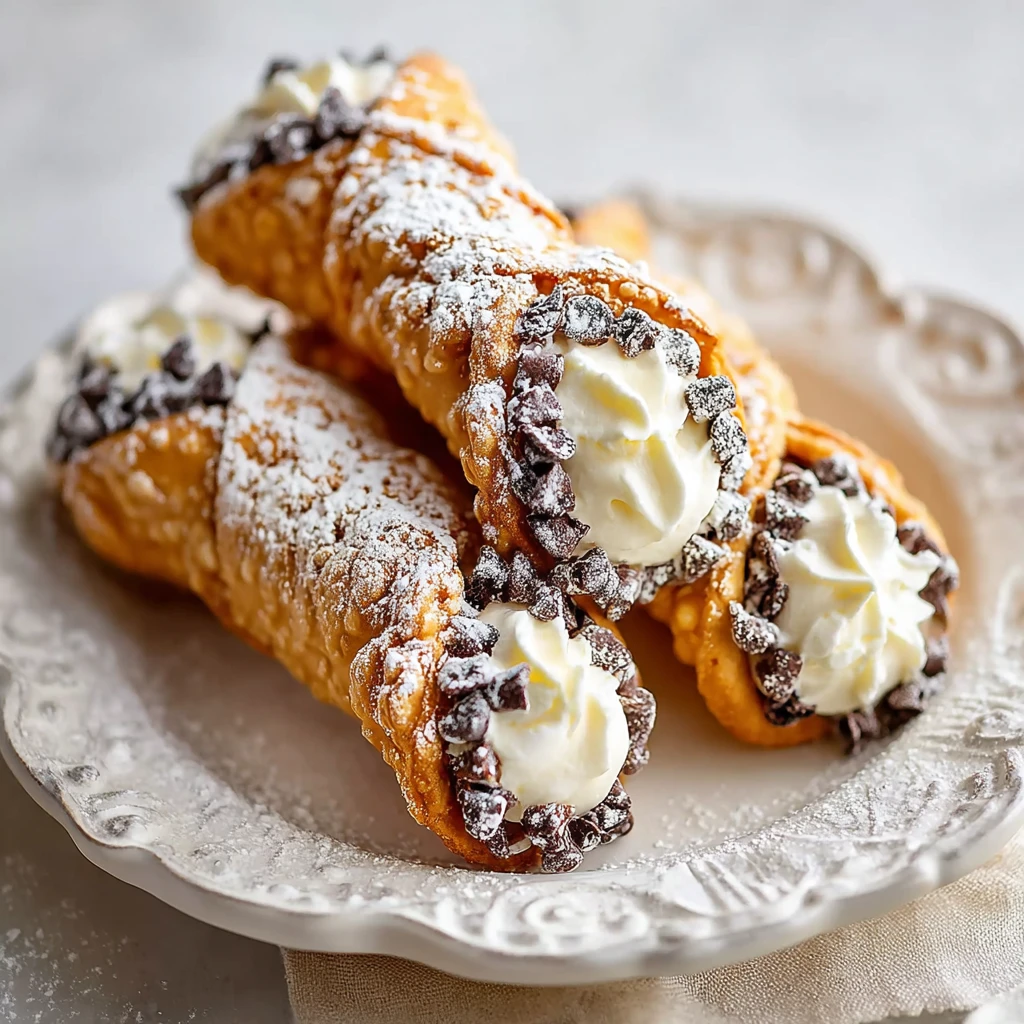
The Secret to the Best Easy Homemade Cannoli
Introduction
Imagine the aroma of freshly baked pastries wafting through your kitchen, filling the air with warmth and anticipation. In the realm of Italian desserts, few treats are as iconic and beloved as the cannoli. Crispy, flaky shells filled with creamy, sweet ricotta cheese are a true delight for the senses. Today, we unravel the secrets to creating the best easy homemade cannoli, allowing you to bring a taste of Italy into your own home.
Why You’ll Love This Recipe
Our easy homemade cannoli recipe combines simplicity with decadence, offering a delightful culinary experience without the need for intricate techniques or specialized equipment. The result? Cannoli that are crispy on the outside, creamy on the inside, and bursting with flavor. Whether you’re a seasoned home cook or a novice in the kitchen, this recipe is sure to impress.
Furthermore, by crafting these cannoli at home, you have full control over the ingredients, ensuring a fresh and wholesome final product. Say goodbye to store-bought versions laden with preservatives and artificial additives—our recipe prioritizes quality and taste above all.
For those with dietary preferences, this homemade cannoli recipe can easily be adapted to suit various needs. Whether you’re looking to reduce sugar content, use gluten-free alternatives, or explore vegan options, the versatility of this recipe makes it a winner for all.
Ingredients
To embark on your cannoli-making journey, you will need the following ingredients:
– Cannoli shells (store-bought or homemade)
– Ricotta cheese
– Powdered sugar
– Vanilla extract
– Chocolate chips
– Candied fruit
– Vegetable oil for frying
Feel free to customize your cannoli filling with optional ingredient substitutions such as pistachios, orange zest, or cinnamon. Let your creativity shine as you tailor these delectable treats to your taste preferences.
Step-by-Step Instructions
1. In a bowl, combine the ricotta cheese, powdered sugar, and vanilla extract. Mix until smooth.
2. Fold in the chocolate chips and candied fruit to the ricotta mixture.
3. Fill a piping bag with the ricotta filling.
4. Gently pipe the filling into each end of the cannoli shells, ensuring even distribution.
5. Heat vegetable oil in a pan for frying.
6. Fry the filled cannoli shells until golden brown and crispy.
7. Remove from the oil and let them cool before serving.
Pro tip: To achieve extra crispiness, dust the cannoli shells with powdered sugar immediately after frying. This simple step adds a delightful crunch to every bite.
Expert Tips for Success
For the best results when making homemade cannoli, keep these expert tips in mind:
– Ensure the ricotta cheese is well-drained to prevent a watery filling.
– Use fresh, high-quality ingredients for an authentic flavor profile.
– Seal the ends of the cannoli shells with a mixture of powdered sugar and water to keep them crispy.
Avoid common mistakes such as overfilling the cannoli shells or frying them at the wrong temperature. By following these tips, you’ll elevate your cannoli-making skills to new heights.
Variations and Substitutions
Looking to put a unique twist on your cannoli? Consider these creative variations:
– Swap the chocolate chips for chopped pistachios for a nutty crunch.
– Incorporate orange zest into the ricotta filling for a citrusy burst of flavor.
– For a modern twist, drizzle melted dark chocolate over the assembled cannoli.
Feel free to experiment with different flavor combinations and textures to create cannoli that cater to your personal preferences and culinary imagination.
Serving Suggestions
To savor the full experience of homemade cannoli, consider the following serving suggestions:
– Dust the finished cannoli with cocoa powder for an elegant touch.
– Serve alongside a cup of freshly brewed espresso or a glass of sweet dessert wine.
– Garnish the serving plate with fresh mint leaves for a pop of color.
Whether enjoyed as a standalone dessert or as the grand finale to a lavish Italian feast, homemade cannoli are sure to delight your taste buds and impress your guests.
FAQs
Q: Can I make the cannoli shells ahead of time?
A: Absolutely! Store the unfilled shells in an airtight container to maintain their crispness until ready to use.
Q: How long can the cannoli be stored?
A: For optimal freshness, consume the cannoli within 1-2 days of filling to prevent the shells from becoming soggy.
Should you encounter any challenges during the cannoli-making process, refer to these frequently asked questions for guidance and troubleshooting tips to ensure a seamless culinary experience.
Final Thoughts
As we conclude our journey into the realm of homemade cannoli, we hope you feel inspired to embark on your own culinary adventure. With a blend of tradition, innovation, and a sprinkle of creativity, you can craft cannoli that not only tantalize the taste buds but also create lasting memories around the dining table.
So, gather your ingredients, unleash your inner chef, and let the magic of homemade cannoli transport you to the bustling streets of Sicily or the charming cafes of Rome. Embrace the joy of creating something delicious from scratch and relish every bite of these delectable Italian treats.
The Secret to the Best Easy Homemade Cannoli
Crispy, flaky cannoli shells filled with creamy ricotta cheese, powdered sugar, vanilla extract, chocolate chips, and candied fruit. This easy homemade cannoli recipe is a delightful Italian dessert that you can customize to suit your tastes.
Ingredients
- Cannoli shells (store-bought or homemade)
- 2 cups Ricotta cheese
- 1 cup Powdered sugar
- 1 teaspoon Vanilla extract
- 1/2 cup Chocolate chips
- 1/4 cup Candied fruit
- Vegetable oil for frying
Directions
- In a bowl, combine the ricotta cheese, powdered sugar, and vanilla extract. Mix until smooth.
- Fold in the chocolate chips and candied fruit to the ricotta mixture.
- Fill a piping bag with the ricotta filling.
- Gently pipe the filling into each end of the cannoli shells, ensuring even distribution.
- Heat vegetable oil in a pan for frying.
- Fry the filled cannoli shells until golden brown and crispy.
- Remove from the oil and let them cool before serving.