

Ouchi Cake’s® | Bolos & Cupcakes | Castanhal : • 𝐕𝐈𝐍𝐓𝐀𝐆𝐄 𝐂𝐀𝐊𝐄 💕
Welcome to the delightful world of Ouchi Cake, where vintage charm meets irresistible flavors. Whether you’re looking to create a show-stopping cake for a special occasion or indulge in the simple pleasure of a cupcake, this recipe will guide you through the process of crafting a delectable homemade dessert. Discover the magic of vintage cake, perfected with Ouchi Cake’s touch, right here in Castanhal.
Ingredients
Dry Ingredients
- 2 cups all-purpose flour
- 1 ½ cups granulated sugar
- ¾ cup unsweetened cocoa powder
- 1 ½ teaspoons baking powder
- 1 ½ teaspoons baking soda
- 1 teaspoon salt
- Note: Opt for a fine grain sugar for a smoother texture in the batter.
Wet Ingredients
- 2 large eggs
- 1 cup whole milk
- ½ cup vegetable oil
- 2 teaspoons vanilla extract
- 1 cup boiling water
- Tip: Use room temperature eggs and milk to ensure better emulsification in the batter, resulting in a tender crumb.
Toppings and Frostings
- 2 cups heavy cream
- ½ cup powdered sugar
- 2 teaspoons vanilla extract
- Fresh berries or sprinkles for garnish (optional)
- Suggestion: For a tangy twist, include a tablespoon of lemon zest in the frosting for a refreshing citrus note.
Note: For a richer flavor, consider using high-quality cocoa powder. Substitute whole milk with almond milk for a dairy-free option. Ensure the cocoa is sifted to avoid lumps in the batter.
Steps / Instructions
- Preheat your oven to 350°F (175°C). Grease and flour two 9-inch round cake pans. Ensure your oven rack is in the center position to promote even baking.
- In a large mixing bowl, combine the flour, sugar, cocoa powder, baking powder, baking soda, and salt. Mix well to ensure all dry ingredients are evenly incorporated. A sifter can be helpful to aerate and blend these ingredients thoroughly.
- In another bowl, beat the eggs until light and frothy. Add the milk, vegetable oil, and vanilla extract. Mix until smooth. The mixture should be pale yellow and slightly thickened.
- Gradually add the wet ingredients to the dry ingredients, mixing on medium speed for about 2 minutes. Scrape down the sides of the bowl to ensure a uniform blend.
- Slowly stir in the boiling water. The batter will be thin, which is normal. This step enhances the chocolate flavor and provides a moist texture.
- Pour the batter evenly into the prepared cake pans. Tap the pans gently on the counter to release any air bubbles. Bake for 30 to 35 minutes, or until a toothpick inserted into the center comes out clean.
- Allow the cakes to cool in the pans for 10 minutes, then remove them from the pans to cool completely on a wire rack. Cooling eliminates excess moisture and helps prevent the cake from becoming soggy.
- For the frosting, whip the heavy cream, powdered sugar, and vanilla extract until stiff peaks form. This process should take about 3 to 5 minutes on medium-high speed.
- Once the cakes are cool, spread the frosting between the layers and over the top and sides of the cake. Decorate with fresh berries or sprinkles if desired. For an even coat, apply a crumb coat first, refrigerate for 15 minutes, and then finish with a thick frosting layer.
Tips & Tricks
- Storage: Store the cake in an airtight container in the refrigerator for up to 3 days. Allow slices to reach room temperature before serving for the best texture.
- To make ahead, bake the cake layers in advance and wrap them tightly in plastic wrap until ready to use. This can actually enhance flavor as the cake sets.
- Avoid overmixing the batter to prevent a dense cake texture. Stop mixing as soon as the flour streaks disappear.
- For best results, ensure all ingredients are at room temperature before starting. This step is crucial for achieving a uniform batter and proper rise.
- Use a serrated knife for a clean cut when slicing the cake. This tool helps maintain the cake’s shape and prevents tearing.
- Consider using a cake turntable when frosting to achieve a smooth and professional finish easily.
Variations
- Vegan Option: Replace eggs with flax eggs (1 tablespoon flaxseed meal + 3 tablespoons water per egg) and use plant-based milk. Ensure your chocolate is dairy-free as well.
- Gluten-Free: Swap all-purpose flour with a gluten-free flour blend. Check labels to ensure no cross-contamination if you have sensitivity.
- Flavor Twist: Add a teaspoon of almond extract for a nutty flavor. This can be a delightful complement to the chocolate.
- Chocolate Ganache: Substitute frosting with a rich chocolate ganache for a luxurious finish. Use equal parts cream and chocolate, melt together, and pour over the cake for a glossy look.
- Fruit Infusion: Incorporate mashed bananas or shredded coconut into the batter for a tropical flavor profile.
Serving Suggestions
- Pair this vintage cake with a cup of freshly brewed coffee or a glass of iced tea. Try this Perfecte Berry Iced Tea for a refreshing complement. The tea’s fruitiness enhances the chocolate notes.
- For a festive occasion, serve alongside a selection of strawberry smoothies or lemonade. Their tartness complements the sweetness perfectly.
- Garnish with edible flowers or seasonal fruits for an elegant touch. These natural decorations add visual appeal and subtle flavor variations.
- Offer small slices as a sweet treat at parties, paired with gourmet desserts or Brazilian sweets. Try pairing with brigadeiros for a classic touch.
- Present the cake on a vintage cake stand for added charm and nostalgia, enhancing the overall aesthetic of your event.
FAQ
- Can I make this cake without a stand mixer? Yes, a hand mixer or a whisk can be used to mix the batter and whip the cream, though it may require more effort. Ensure thorough mixing to avoid lumps.
- What if my cake is too dry? Ensure you do not overbake, and consider brushing the layers with a simple syrup before frosting to add moisture. Simple syrup also adds a subtle sweetness.
- Can I freeze the cake? Yes, wrap the unfrosted cake layers in plastic wrap and freeze for up to 3 months. Thaw in the refrigerator before frosting. This method helps preserve the cake’s moisture and texture.
- How can I achieve a smooth frosting finish? Use an offset spatula for even application, and dip it in warm water before smoothing for a polished look. Rotate the cake as you work for more control.
- How can I avoid lopsided cake layers? Level your cake layers using a serrated knife before stacking and frosting. This ensures even distribution and a professional presentation.
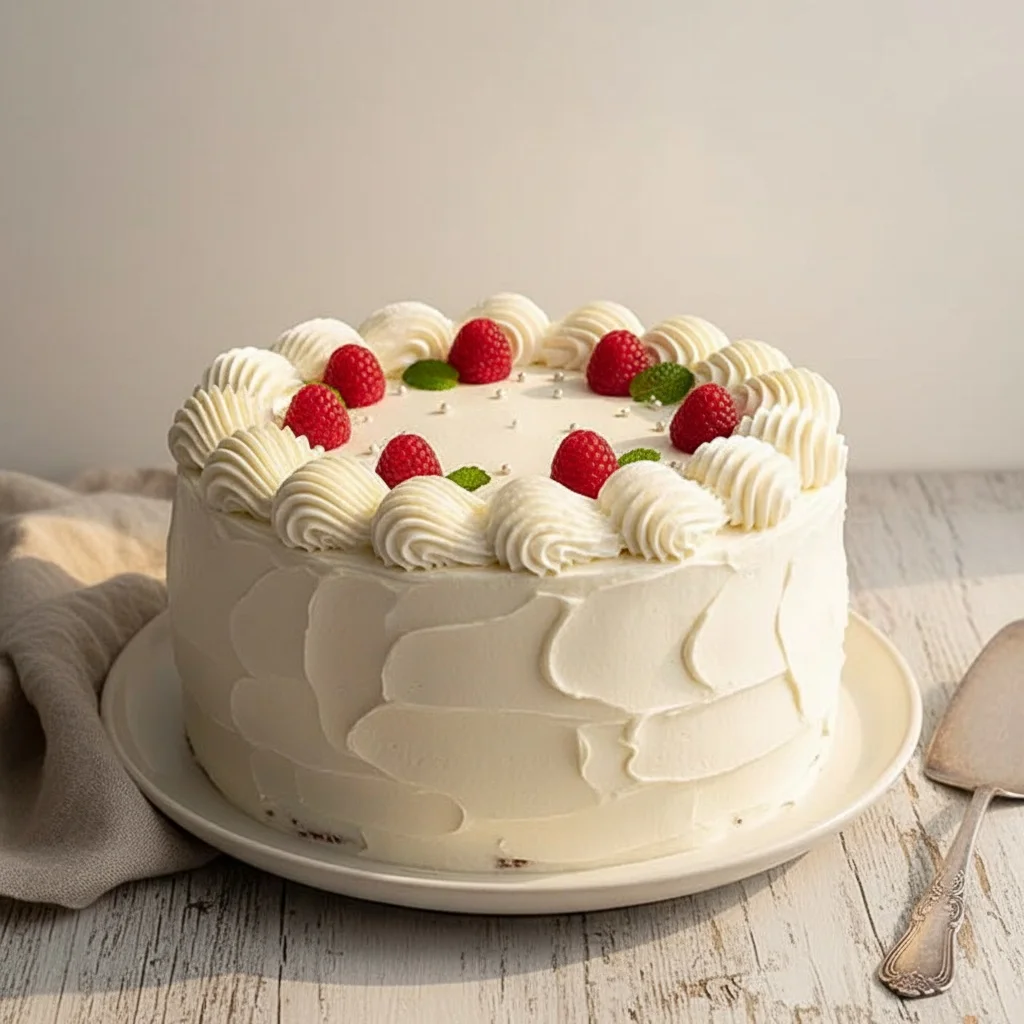
Vintage Cake
A delightful homemade vintage cake with a touch of Ouchi Cake's charm, perfect for any special occasion.
Ingredients
- 2 cups all-purpose flour
- 1 ½ cups granulated sugar
- ¾ cup unsweetened cocoa powder
- 1 ½ teaspoons baking powder
- 1 ½ teaspoons baking soda
- 1 teaspoon salt
- 2 large eggs
- 1 cup whole milk
- ½ cup vegetable oil
- 2 teaspoons vanilla extract
- 1 cup boiling water
- 2 cups heavy cream
- ½ cup powdered sugar
- 2 teaspoons vanilla extract
- Fresh berries or sprinkles for garnish (optional)
Directions
Preheat your oven to 350°F (175°C). Grease and flour two 9-inch round cake pans. Ensure your oven rack is in the center position to promote even baking.
In a large mixing bowl, combine the flour, sugar, cocoa powder, baking powder, baking soda, and salt. Mix well to ensure all dry ingredients are evenly incorporated. A sifter can be helpful to aerate and blend these ingredients thoroughly.
In another bowl, beat the eggs until light and frothy. Add the milk, vegetable oil, and vanilla extract. Mix until smooth. The mixture should be pale yellow and slightly thickened.
Gradually add the wet ingredients to the dry ingredients, mixing on medium speed for about 2 minutes. Scrape down the sides of the bowl to ensure a uniform blend.
Slowly stir in the boiling water. The batter will be thin, which is normal. This step enhances the chocolate flavor and provides a moist texture.
Pour the batter evenly into the prepared cake pans. Tap the pans gently on the counter to release any air bubbles. Bake for 30 to 35 minutes, or until a toothpick inserted into the center comes out clean.
Allow the cakes to cool in the pans for 10 minutes, then remove them from the pans to cool completely on a wire rack. Cooling eliminates excess moisture and helps prevent the cake from becoming soggy.
For the frosting, whip the heavy cream, powdered sugar, and vanilla extract until stiff peaks form. This process should take about 3 to 5 minutes on medium-high speed.
Once the cakes are cool, spread the frosting between the layers and over the top and sides of the cake. Decorate with fresh berries or sprinkles if desired. For an even coat, apply a crumb coat first, refrigerate for 15 minutes, and then finish with a thick frosting layer.
Recipe Reviews
- ★★★★★
Excellent recipe!
Leave a Reply
Your email address will not be published. Required fields are marked *


Excellent recipe!