

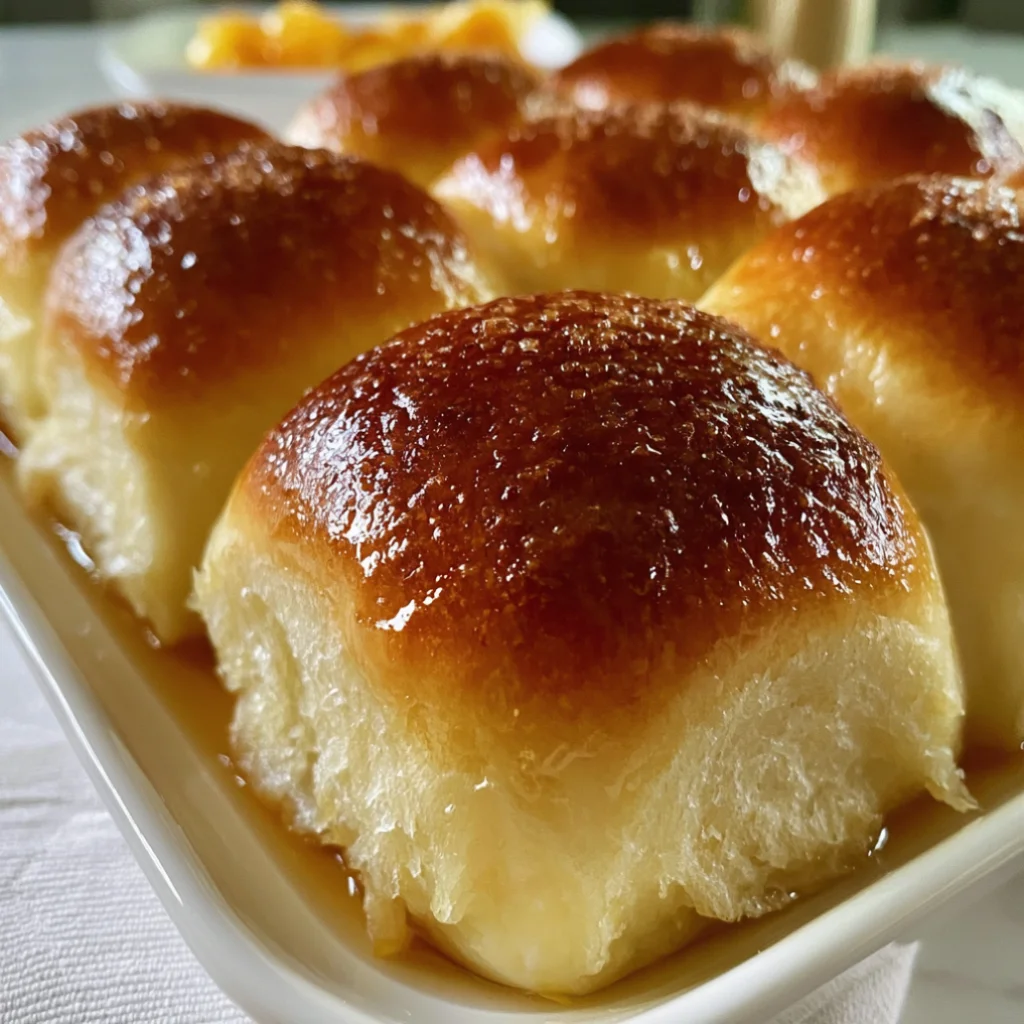
Sourdough Hawaiian Rolls
Sourdough Hawaiian Rolls are the perfect blend of sweet, soft, and buttery goodness, making them a delightful addition to any meal, especially during summer gatherings and BBQs. These rolls boast a rich buttery flavor infused with hints of tropical sweetness, combining the classic appeal of homemade sourdough bread with a hint of island inspiration. With their fluffy texture and warm, golden crust, they are not only easy to make but also elevate your dinner table with their artisan touch. Serve them as a side dish, or fill them with your favorite meats and toppings for a satisfying snack.
Ingredients
- Dry Ingredients:
- 3 cups all-purpose flour, measured properly to ensure the right texture
- 1 cup bread flour, which gives the rolls their unique chewiness
- 1/4 cup granulated sugar, adding that touch of sweetness
- 1 teaspoon salt, essential for flavor enhancement
- 1 teaspoon instant yeast, which helps the dough rise effectively
- Wet Ingredients:
- 1 cup active sourdough starter (at room temperature), providing the unique tangy flavor
- 1/2 cup whole milk (warm), which helps to create a tender crumb
- 1/4 cup unsweetened pineapple juice (for that sweet Hawaiian flavor), contributing to the rolls’ signature taste
- 1/4 cup unsalted butter (melted, plus extra for greasing), adding richness and moisture to the dough
- Toppings:
- 1 egg (beaten, for egg wash), ensuring a golden-brown crust on the rolls
- 1 tablespoon honey (for glaze, optional), which adds a glossy finish and extra sweetness
Use high-quality ingredients for the best results, especially fresh sourdough starter and good-quality butter. Freshly milled flours can also enhance the flavor profile significantly. If desired, you can substitute vegetable oil for butter or use a dairy-free milk alternative, such as almond or oat milk, to accommodate dietary preferences. You can learn more about this topic and discover the history behind these delightful rolls.
Steps / Instructions
- Mix the Dry Ingredients: In a large bowl, whisk together the all-purpose flour, bread flour, sugar, salt, and instant yeast until well combined. This step is vital to ensure that the yeast and salt are evenly distributed throughout the flour.
- Combine Wet Ingredients: In another bowl, mix the active sourdough starter, warm milk, pineapple juice, and melted butter. Ensure the mixture is smooth and homogenous, as lumps can lead to uneven dough consistency.
- Combine Mixtures: Pour the wet ingredients into the dry ingredients. Mix with a wooden spoon or spatula until a shaggy dough forms. If the dough is too sticky, add a little more flour, one tablespoon at a time, until you achieve a manageable consistency. The dough should still feel slightly tacky but not overly sticky.
- Knead the Dough: Turn the dough onto a lightly floured surface. Knead the dough for about 8-10 minutes until it becomes smooth and elastic. The dough should spring back when poked, indicating it has developed sufficient gluten. If using a stand mixer, knead on medium speed with a dough hook for about 5-6 minutes until you achieve the same elasticity.
- First Rise: Place the kneaded dough in a greased bowl, cover it with a damp cloth or plastic wrap, and let it rise in a warm place for about 1-2 hours or until doubled in size. The dough should feel airy and light, and you may see bubbles forming on the surface.
- Shape the Rolls: Once risen, punch down the dough to release the gas. Divide the dough into 12 equal pieces, using a bench scraper for accuracy if desired. Shape each piece into a ball by tucking the edges underneath. Place the rolls in a greased 9×13 inch baking dish or on a parchment-lined baking sheet, ensuring they are close but not touching.
- Second Rise: Cover the shaped rolls with a towel and let them rise for another 30-45 minutes until puffy and touching. This second rise is crucial for achieving a light, airy texture in the finished rolls.
- Preheat the Oven: While the rolls are rising, preheat your oven to 350°F (175°C). Ensuring your oven is at the right temperature allows the rolls to bake evenly.
- Prepare for Baking: Brush the tops of the rolls with the beaten egg. This gives them a beautiful golden color. If desired, sprinkle sesame seeds or flaked coconut on top for added flavor and texture, enhancing their visual appeal.
- Bake the Rolls: Bake the rolls in the preheated oven for 20-25 minutes or until golden brown and the internal temperature reaches 190°F (88°C). The rolls should sound hollow when tapped on the bottom, indicating they are fully baked.
- Glaze (Optional): In a small saucepan, gently heat the honey until just warm. Brush the warm honey over the freshly baked rolls for a lovely shine and added sweetness, making them even more irresistible.
- Cool and Serve: Allow the rolls to cool in the pan for about 10 minutes before transferring them to a wire rack to cool completely. Serve warm for the best experience, as the warmth enhances the buttery flavor.
Tips & Tricks
For the best results with your Sourdough Hawaiian Rolls, consider the following tips: Check out our related guide for more tips. These insights will help you troubleshoot and perfect your baking skills.
- Storage: Store the rolls in an airtight container at room temperature for up to 3 days to maintain their softness. For longer storage, freeze them in a zip-top bag for up to 3 months. Reheat them in a 350°F (175°C) oven for 5-10 minutes before serving to restore their fresh-baked flavor and texture.
- Make-Ahead Option: You can prepare the dough a day in advance. After shaping the rolls, place them in the refrigerator overnight. Allow them to come to room temperature and rise for about an hour before baking to achieve the best texture.
- Avoid Common Mistakes: Ensure your sourdough starter is active and bubbly before using it. If your rolls don’t rise properly, check the temperature of your environment, as yeast thrives in warmth. If the dough feels too dry, add a splash of water; if it’s too wet, sprinkle in more flour gradually.
- Pro Technique: If you want to create a steam effect in the oven, place a small pan filled with water on the bottom rack while baking. This creates humidity and helps the rolls develop a nice crust while keeping the inside soft and fluffy.
Variations
While this Sourdough Hawaiian Rolls recipe is delicious as is, consider making some variations to suit your taste:
- Fruity Additions: Add chopped dried pineapple or coconut flakes into the dough for extra texture and flavor, enhancing the tropical aspect of the rolls.
- Herb-Infused Rolls: Mix in fresh herbs like rosemary or thyme for a savory twist, which can give the rolls an unexpected depth of flavor that pairs well with savory dishes.
- Vegan Option: Substitute the butter with coconut oil and replace the egg wash with plant-based milk. This variation maintains the rolls’ delightful texture while catering to vegan diets.
Sourdough Hawaiian Rolls
Sourdough Hawaiian Rolls are the perfect blend of sweet, soft, and buttery goodness, making them a delightful addition to any meal, especially during summer gatherings and BBQs. These rolls boast a rich buttery flavor infused with hints of tropical sweetness, combining the classic appeal of homemade sourdough bread with a hint of island inspiration.
Ingredients
- 3 cups all-purpose flour
- 1 cup bread flour
- 1/4 cup granulated sugar
- 1 teaspoon salt
- 1 teaspoon instant yeast
- 1 cup active sourdough starter (at room temperature)
- 1/2 cup whole milk (warm)
- 1/4 cup unsweetened pineapple juice
- 1/4 cup unsalted butter (melted, plus extra for greasing)
- 1 egg (beaten, for egg wash)
- 1 tablespoon honey (for glaze, optional)
Directions
In a large bowl, whisk together the all-purpose flour, bread flour, sugar, salt, and instant yeast until well combined.
In another bowl, mix the active sourdough starter, warm milk, pineapple juice, and melted butter. Ensure the mixture is smooth and homogenous.
Pour the wet ingredients into the dry ingredients. Mix with a wooden spoon or spatula until a shaggy dough forms.
Turn the dough onto a lightly floured surface. Knead the dough for about 8-10 minutes until it becomes smooth and elastic.
Place the kneaded dough in a greased bowl, cover it with a damp cloth or plastic wrap, and let it rise in a warm place for about 1-2 hours or until doubled in size.
Punch down the dough to release the gas. Divide the dough into 12 equal pieces and shape each piece into a ball.
Cover the shaped rolls with a towel and let them rise for another 30-45 minutes until puffy.
Preheat your oven to 350°F (175°C).
Brush the tops of the rolls with the beaten egg. Optionally sprinkle sesame seeds or flaked coconut on top.
Bake the rolls in the preheated oven for 20-25 minutes or until golden brown and the internal temperature reaches 190°F (88°C).
In a small saucepan, gently heat the honey until just warm and brush it over the freshly baked rolls for a lovely shine.
Allow the rolls to cool in the pan for about 10 minutes before transferring them to a wire rack.
Recipe Reviews
- ★★★★★
Excellent recipe!
Leave a Reply
Your email address will not be published. Required fields are marked *


Excellent recipe!