Homemade Crystal Candy
Introduction
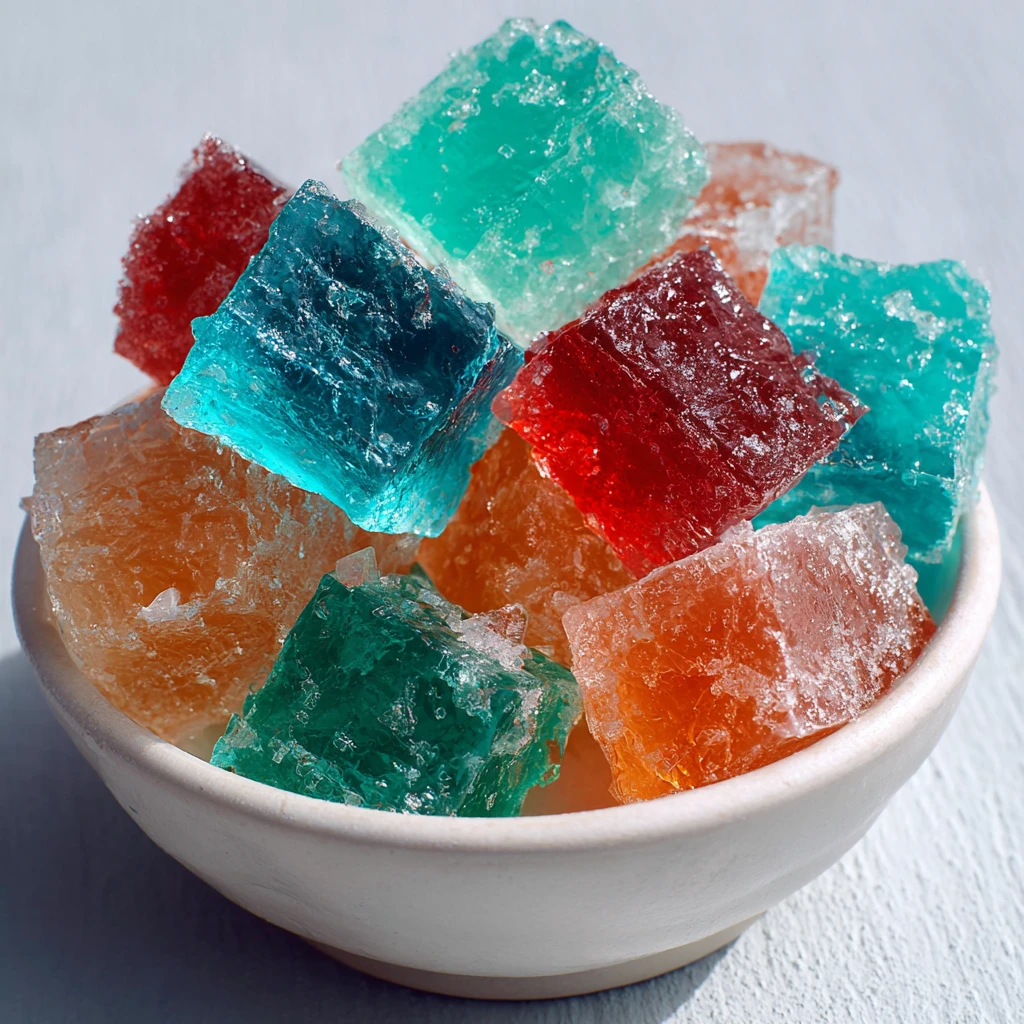
Imagine the delight of creating your own sparkling, sugary crystals at home – a treat that not only tantalizes your taste buds but also dazzles your eyes. Homemade crystal candy is a magical confectionery experience that brings joy to both the creator and the consumer. In this article, we will delve into the art of making this sweet delicacy, exploring its history, the science behind its formation, and the sheer pleasure it brings.
Crystal candy holds a special place in the world of homemade treats, with its unique combination of science and artistry. From its humble beginnings to its current popularity in various cultures, this candy has a rich history that adds to its allure. Join us on a journey to discover the secrets of crafting these beautiful and delicious crystals in your own kitchen.
As we unravel the intricacies of homemade crystal candy, you’ll find yourself drawn into a world where sugar transforms into shimmering gems that captivate the senses. Whether you’re a seasoned candy maker or a curious beginner, this recipe offers a rewarding experience that will leave you craving more.
Get ready to embark on a sweet adventure as we explore the enchanting world of homemade crystal candy – a confectionery masterpiece that combines science, art, and a touch of magic.
Why You’ll Love Homemade Crystal Candy
Creating your own homemade crystal candy is a deeply rewarding experience that allows you to unleash your creativity in the kitchen. The process of watching sugar crystals form and grow before your eyes is both mesmerizing and satisfying, offering a unique sense of accomplishment.
One of the best features of homemade crystal candy is its versatility. You can customize the colors, flavors, and shapes to suit any occasion or personal preference. Whether you’re making a batch for a special celebration or just for fun, this recipe allows you to express your creativity in a delicious and visually stunning way.
Unlike store-bought candies, homemade crystal candy gives you full control over the ingredients, allowing you to create a treat that aligns with your dietary preferences. By using high-quality ingredients and avoiding artificial additives, you can enjoy a healthier version of this beloved confection.
Indulge in the joy of crafting your own homemade crystal candy and experience the satisfaction of creating a beautiful, tasty treat from scratch. Whether you’re looking for a fun kitchen project or a unique gift idea, this recipe is sure to delight both the maker and the lucky recipients.
Ingredients
To create your own batch of homemade crystal candy, you will need the following ingredients:
– Granulated sugar
– Water
– Food coloring (optional)
– Flavor extracts (e.g., peppermint, vanilla, lemon) (optional)
Feel free to experiment with different colors and flavors to customize your crystal candy to your liking. You can also explore natural food coloring options for a vibrant and chemical-free alternative.
For those with dietary restrictions or preferences, you can opt for organic sugar, plant-based food coloring, and natural flavor extracts to create a healthier version of this classic treat.
Before you begin, gather all the ingredients and equipment you need to ensure a smooth and enjoyable candy-making process.
Step-by-Step Instructions
Follow these simple steps to create your own mesmerizing homemade crystal candy:
1. In a saucepan, combine sugar and water over medium heat, stirring until the sugar dissolves completely.
2. Bring the mixture to a boil without stirring and continue boiling until it reaches the hard-crack stage on a candy thermometer.
3. Remove the pan from heat and stir in food coloring and flavor extracts, if desired.
4. Carefully pour the hot syrup into a heatproof container and let it cool undisturbed until crystals form.
5. Once the crystals have fully formed, break them into pieces and enjoy your homemade crystal candy!
Pro Tip: To encourage crystal growth, try lightly scratching the surface of the candy with a fork after pouring the syrup into the container.
Experiment with different colors, flavors, and shapes to create a stunning array of crystal candies that will dazzle your friends and family.
Expert Tips for Success
For the best results when making homemade crystal candy, keep these expert tips in mind:
– Use a clean saucepan to prevent impurities from affecting the crystal formation.
– Be patient and avoid stirring the syrup while it boils to prevent crystallization.
– Choose high-quality ingredients for a superior taste and texture.
– Store your crystal candy in an airtight container to maintain its freshness and crunchiness.
By following these simple yet crucial tips, you can ensure that your homemade crystal candy turns out perfectly every time, delighting both yourself and your lucky taste testers.
Variations and Substitutions
Get creative with your homemade crystal candy by exploring these variations and substitutions:
– Use natural fruit juices or extracts to add unique flavors to your candy.
– Experiment with different types of sweeteners, such as honey or maple syrup, for a twist on the classic recipe.
– Add edible glitter or shimmer dust to your crystals for an extra touch of sparkle and magic.
– Create layered or marbled effects by pouring different colored syrups into the container.
Whether you’re looking to add a personal touch to your crystal candy or cater to specific dietary needs, these variations and substitutions offer endless possibilities for customization and experimentation.
Serving Suggestions
When it comes to serving your homemade crystal candy, the options are as diverse as your creativity:
– Display your crystal candy on a decorative platter for a stunning centerpiece at parties and gatherings.
– Package the candies in clear bags or jars tied with ribbons for beautiful homemade gifts.
– Pair the sweet crystals with a cup of hot tea or coffee for a delightful treat on a cozy afternoon.
– Crush the candy and use it as a colorful and flavorful topping for cakes, cupcakes, or ice cream.
However you choose to enjoy your homemade crystal candy, be sure to savor each delightful bite and share the joy of this enchanting confection with your loved ones.
FAQs
Here are some common questions and answers about making homemade crystal candy:
Q: Can I use natural sweeteners like stevia or monk fruit to make crystal candy?
A: While traditional crystal candy recipes rely on sugar for crystal formation, you can experiment with alternative sweeteners, keeping in mind that the texture and taste may vary.
Q: How long does homemade crystal candy last?
A: Properly stored in an airtight container, homemade crystal candy can last for several weeks, maintaining its crunchiness and flavor.
Q: Can I make crystal candy without a candy thermometer?
A: While a candy thermometer ensures precise temperature control, you can test the syrup using the cold water method to determine its readiness for crystal formation.
Q: Why is it important to let the syrup cool undisturbed when making crystal candy?
A: Allowing the syrup to cool without disturbance promotes the formation of large sugar crystals, resulting in the signature texture and appearance of crystal candy.
Final Thoughts
Homemade crystal candy is more than just a sweet treat – it’s a captivating culinary adventure that invites you to explore the art and science of candy making. By following this recipe and experimenting with different colors, flavors, and techniques, you can create a dazzling array of homemade crystals that will delight your senses and spark your imagination.
So gather your ingredients, roll up your sleeves, and prepare to embark on a magical journey into the world of homemade crystal candy. Let your creativity shine as you craft these shimmering gems and share the joy of your culinary creations with family and friends. Indulge in the magic of homemade crystal candy and experience the sweetness of a truly homemade delight.
Homemade Crystal Candy
Indulge in the magic of creating your own sparkling, sugary crystals at home with this mesmerizing homemade crystal candy recipe. Customize colors and flavors to make this visually stunning treat that combines science, art, and a touch of magic.
Ingredients
- 2 cups granulated sugar
- 1 cup water
- Food coloring (optional)
- Flavor extracts (e.g., peppermint, vanilla, lemon) (optional)
Directions
- In a saucepan, combine sugar and water over medium heat, stirring until the sugar dissolves completely.
- Bring the mixture to a boil without stirring and continue boiling until it reaches the hard-crack stage on a candy thermometer.
- Remove the pan from heat and stir in food coloring and flavor extracts, if desired.
- Carefully pour the hot syrup into a heatproof container and let it cool undisturbed until crystals form.
- Once the crystals have fully formed, break them into pieces and enjoy your homemade crystal candy!